
Do you need to repair a minor scratch? Have you had someone scratch your car in the parking lot and take off? Or maybe you goofed up and put a little nick of a scratch in it yourself? Either way I am sure there are two questions that pop into your mind – How do I fix this scratch? & Should I go through insurance to fix my car? Nothing can make you cringe more than seeing a minor scratch or swirl mark in your cars paint surface.
The good news is that it is fairly easy to get minor scratches and blemishes out of your cars paint. In fact, we have created the guide below to help you in doing this very repair.
Note: If you have a deep scratch / gouge in your paint give our DIY guide on how to fix deep scratches and key marks a read.
WHAT TOOLS ARE REQUIRED TO REPAIR / FIX MINOR CAR SCRATCHES?
To get the best results in repairing scratches in your cars paint, you’ll want to have some basic automotive detail products handy. You can do this entirely by hand without the use of a polisher. However, for best results I encourage you to use a dual action polisher such as the Porter Cable 7424x or similar. With this machine you will want to properly select your polishing pads. If you opt to do this entirely by hand, the steps will remain the same. The difference is that you will replace the polishing machine with your muscle.
For your convenience I have added links to the products that I have used below. You are more than welcome to substitute your own products for my list, just know that my experience is with the listed products.
- Rubbing Compound
- Polishing Compound
- Swirl Remover
- Polish
- Wax
- Cheese Cloth
- Microfiber Cloths (4)
- Polishing Machine (recommended a Dual Action one)
- Polishing Pads (see our polishing pad guide for help on what to select)
- Car Wash Soap / Dawn Dish Soap
PREPARING YOUR MINOR SCRATCH FOR REPAIR
There is nothing worse than making a minor scratch turn into an even bigger problem by swirling dirt around. Not only can a dirty work surface lead to more scratches in your cars paint, but it also doesn’t let you clearly see the spot for repair. I recommend using a car wash such as Turtle Wax’s Power Wash or dawn dish soap. This will allow you to not only clean the area up, but also strip away any old wax on your paints surface. This is important as old wax can make rubbing / polishing compounds less effective.
DETERMINE IF YOU HAVE A MINOR OR A MAJOR CAR SCRATCH
Now that the area is cleaned up you need to determine if this is a minor scratch repair or a major scratch repair. If it is a major scratch that means it is right through both your clear coat and paint. You will be able to catch it on your fingernail and if you pour water across the scratch it will not disappear. If this what you see then jump right over to our DIY Deep Scratch & Key Mark Repair Guide. If the scratch is minor and disappears when water runs over it, or you can’t quite catch it with your fingernail then keep following the steps below.
RUBBING VS POLISHING COMPOUND – WHAT SHOULD I START WITH?
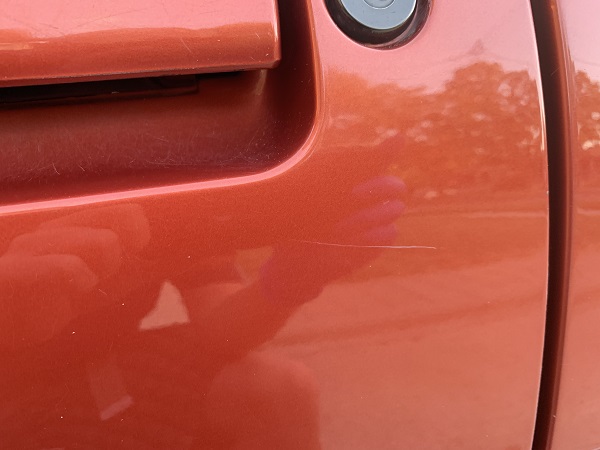
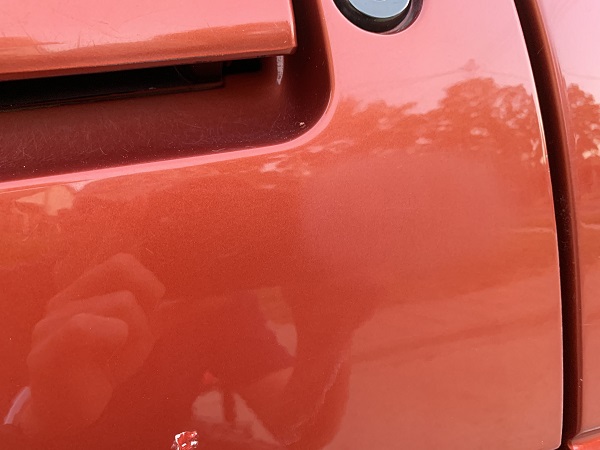
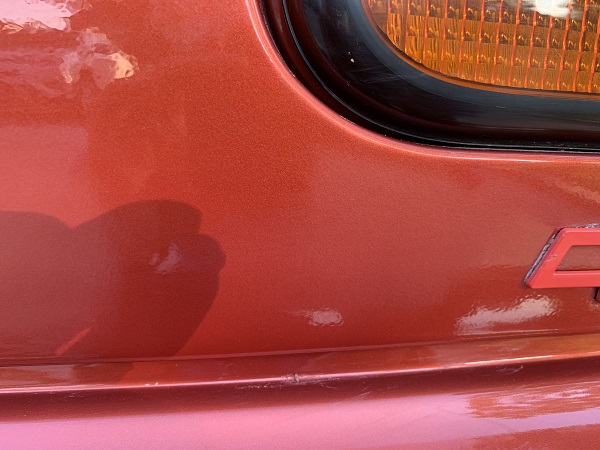
This is where some of your own judgement comes into play. I always start off with the least aggressive products first to see if I can repair the scratch that way. This method adds some time to your repair but typically ensures you protect your paint a little bit better. If you have a really minor faint scratch like the one in this picture below, I would start by putting some polishing compound on your polishing pad and working the area of the scratch.

If you find that the scratch is not disappearing or fading away when using the polishing compound I would step it up the rubbing compound. If the scratch has been removed just using polishing compound, continue reading this guide from “Applying Polishing Compound” down. If the polishing compound on it’s own did not work in removing the scratch, continue to read this guide in the order that it is written.
Take a mental note that if your scratch is near any plastic / rubber trim you may want to cover those areas with painters tape. If you get compound or wax on any trim surfaces it will stain it white and be extremely difficult to remove.
USING RUBBING COMPOUND
Rubbing compound is an abrasive. The best way to use rubbing compound is applying it by hand using a dampened cheese cloth. You then take the cheese cloth containing the rubbing compound and rub it against the scratch. When I say against the scratch I mean if your scratch runs left to right, you will rub the compound up and down. If you are unfamiliar with applying rubbing compound, I took the short video below on how I go about applying it to a horizontal scratch. The full pictures of the repair in the video can be seen in the gallery at the bottom of the page.
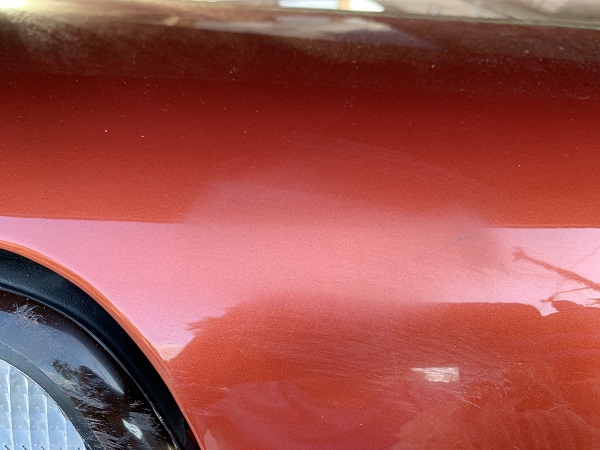
Notice in both the video above and photos in our gallery below that the area gets hazy and fine scratches are being added to your paints surface?
Don’t worry about these fine scratches as they will come out when you use the polishing compound and polisher.
When applying rubbing compound, I like to apply it and work it into the area until I can no longer see the scratch I am working on. When this happens, I wipe away the area so that I can inspect it and determine if I need to continue to work additional rubbing compound in the area. I continue to repeat this step until the scratch is no longer visible as in the photo above when I wipe my surface clean of product.
When the scratch disappears, I will use my polishing compound to clean up the fine scratches that the rubbing compound left. Keep a close eye when applying rubbing compound so you don’t remove any extra clear coat than needed in order to repair the scratch. When the scratch is gone, wipe the area down with a fresh microfiber cloth to remove all rubbing compound residue.
APPLYING POLISHING COMPOUND
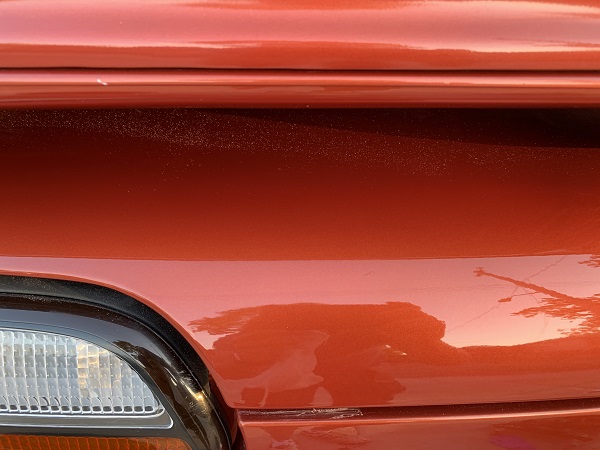
Now that you removed the scratch in your paints surface with the rubbing compound, you need to clean up the tiny scuffs that were left behind. Notice the scuffs in the photos above?
Apply your polishing compound to your polishing pad (I used a yellow hex pad) and fire up your dual action polisher. Apply your polishing compound to the area until you can no longer see the haze left behind from the rubbing compound. If you are using a dual action polisher this will likely only take you 30 seconds to a minute. When you are done the area you worked on, wipe it down with a fresh microfiber cloth. Take the time to inspect the area to ensure you haven’t missed any spots. If you missed anything, now is the time to go over it again with a little more product. This is what the above scratch area looked like after I went over it with some polishing compound:

APPLYING SWIRL REMOVER
If you look closely at your paints surface after applying the polishing compound you will notice that the haze marks from the rubbing compound have been removed. What you’ll also notice is that there are some fine swirl marks that just hit your eye in the right light. If you look back at the photo above you can actually see some of the swirls where the flash from the camera hits the cars paint. If you have a really good eye you’ll also notice that the area you worked on has slightly less lustre to it than your other car panels.
This is why we are stepping our way down to a less aggressive abrasive known as a swirl remover. Apply a tiny drop of swirl remover to your new polishing pad (I used the white hex pad) and work it into your former scratch area. When you are done, wipe the area down with a fresh microfiber cloth. Take the time to inspect the area to ensure you haven’t missed anything and your paint is shiny.
APPLYING POLISH
We’re almost at the end! This is the fun part of shining your panel back up to that showroom shine! Take a bit of car polish and apply it to your polishing pad (I used the blue hex pad) and apply it to your working area. This restores all lustre in your cars paint and gets it shinning again. When you are done, wipe the panel down with a clean microfiber cloth.
APPLYING WAX
The last and final step! The wax is what adds that deep shine and protects your cars paint to help you avoid scratches in the future. I like to add 2 coats of wax to my cars surface for extra protection. Take your favorite wax and apply it to your polishing pad (I used the red or black hex pad). Once you are done, wipe your panel down with a clean microfiber cloth.
Below is a gallery of some of the scratches we were able to repair on our Camaro


SHARE IT!
Be proud of your work! Tag us on Instagram and show off. Then, share our article with your social media groups on Facebook, Instagram, Pintrest, etc. We love helping people out with free car advice!
FREQUENTLY ASKED REPAIR QUESTIONS:
Q: When I use the polisher to apply polishing compound, swirl remover, polish and or wax, how long will it take for me to work the product into the area I am working on?
A: If you are using a DA (dual action) polisher – it should take you around 30 seconds to 1 minute to work a single scratched area approximately 1-2” in size with any of the product mentioned. This of course will vary if the scratched area is larger. It will also vary with your selection of polishing pad.
Q: How long will it take me to repair my scratch using rubbing compound?
A: This will vary depending on how deep and big the scratch is in the clear coat. This is the most time-consuming part of the scratch repair. It can take you anywhere from 5-10 minutes to over an hour.
Q: What if I don’t have a dual action polisher?
A: You can certainly achieve similar results by hand it will just take longer and require a lot of elbow grease.
Q: How often can I remove / repair scratches from the same area on my cars paint?
A: It is best not to think this way. Every time you use a polishing or rubbing compound you are removing some clear coat from your car. It is better to look at it as, lets fix this scratch now and do things like wax or ceramic coat the car to ensure it doesn’t get scratched in the future.
Q: Can you take a look at my scratch and tell me what you think?
A: Sure, if you feel that you need a second opinion or have some questions you can use our contact us page.
Other articles you might be interested in:
Deep Scratch & Key Mark Repair | Waxing & Polishing Your Car | Painting Brake Calipers | Plasti-dipping Your Grille | Rust & Corrosion Repair