
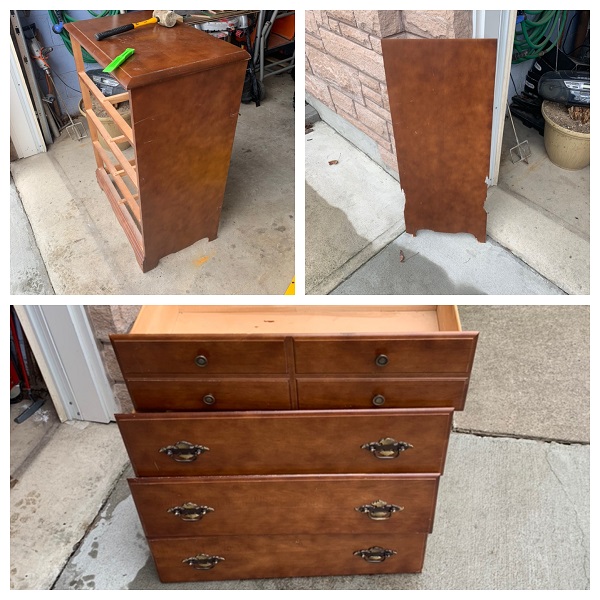
Today I came across an old school bedside dresser that had seen its days and was destined for the trash. The sides were chewed up, the hardware old and it’s appearance dated. It made for the perfect project and addition to a bedroom set for the girlfriend.
Tools / Materials For The Project (with links)
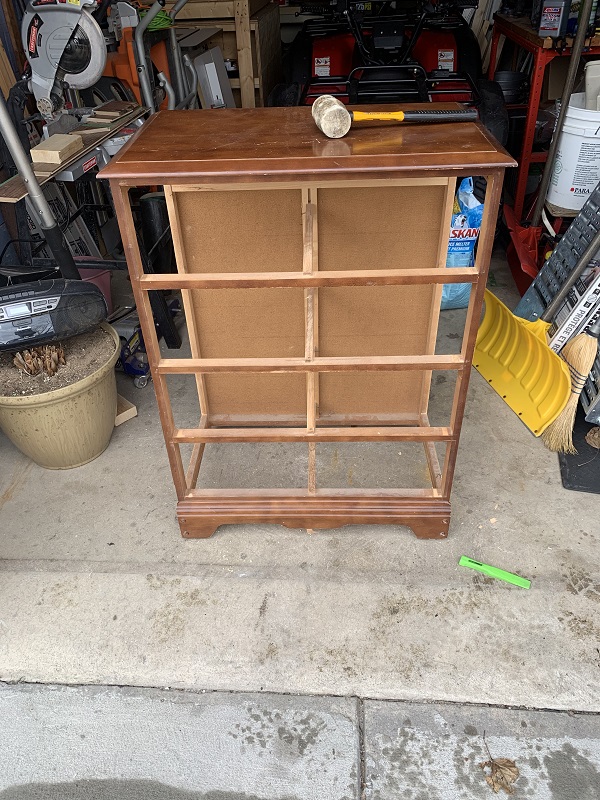
- Rubber Mallet to carefully remove the sides without too much damage!
- Tape Measure
- Jig Saw
- Palm Sander
- Assorted Sandpaper (80-220 grit)
- Stix Primer
- Benjamin Moore Cloud White Paint
- Pre-Stain (water based) (a must to prevent stain blotching)
- Grey Stain (water based) – take your pick, but must be water if using water based prestain. A local hardware store can tint it to your desired colour.
- Varathane Semi Gloss Polyurethane (water based again because I am using water base already)
- Semi Gloss Black Spray Paint
- Wood Glue (I used whatever was at the hardware store, a lot of pros like titebond though)
- Dry Dex (You can buy this cheaper at Home Depot)
- Putty Knife
- Bar Clamps – You can make your own using this and 3/4″ galvenized pipe available at any hardware store.
- Regular Clamps
- Painters tape (frog tape is my favorite)
- Paint Brushes
- Foam Paint Roller(s)
- Plastic Chisel (optional but can help separate boards sometimes without marring)
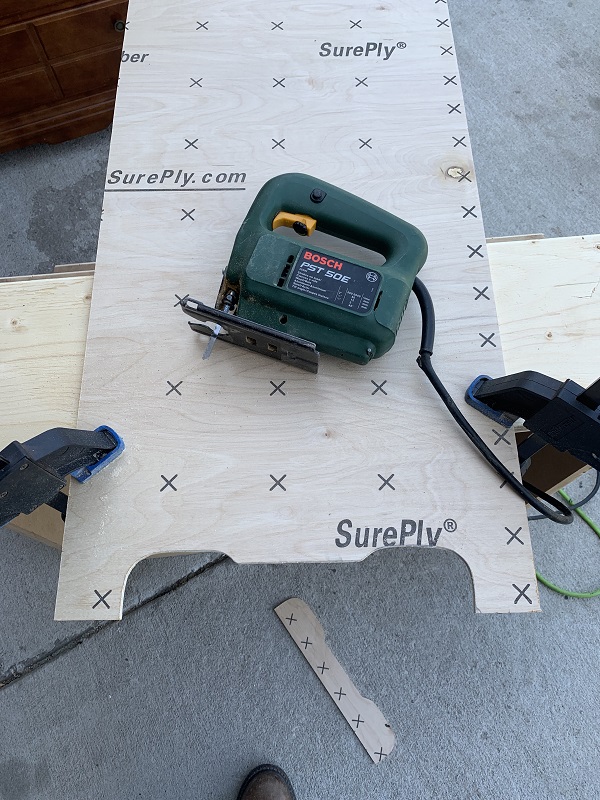
- (1 )48″x48″ sheet of sureply underlay as it was cheap 1/4″ plywood.
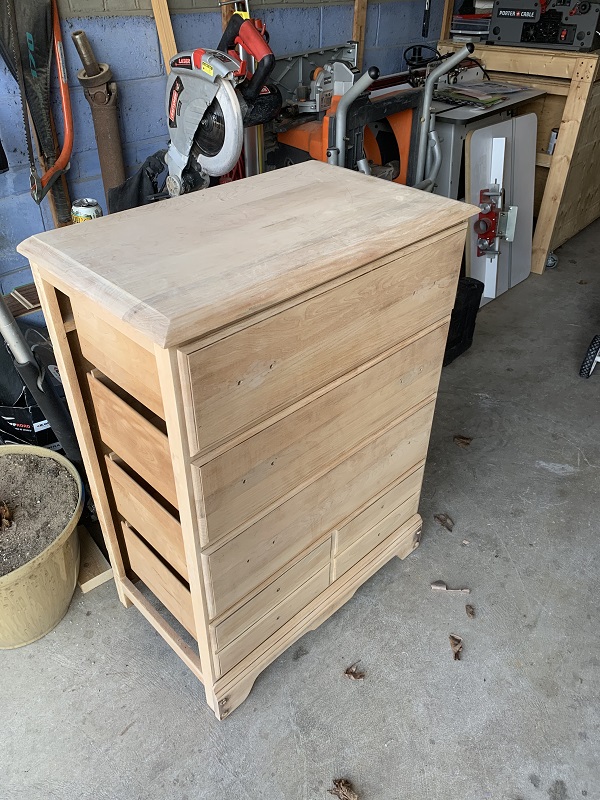
Here is what I had to start with. The below picture already shows where I have removed one of the sides that was damaged. My plan was to remove the damaged sides, replace with plywood, sand everything down, paint, stain and finish.
Once I had the sides off I went to work sanding the entire dresser down. This included the drawer faces, the tops and the frame that the sides bolt onto
Replacing Damaged Parts
There is stuff you can do to hide chipped veneer piece of wood that does not involve replacing the parts, but this dresser had full chunks missing and it was just easier / cleaner for me to do it this way.
Try to get at least one good side so that you can use it as a template. Since the dresser is rectangular in shape all you truly need to trace out is the cutout at the bottom. So don’t worry too much if the whole side doesn’t come out in one piece.
When you do get the piece off, now would be the time to cut your sureply board down to size and lay your “template” piece over it so that you can mimic the shape.
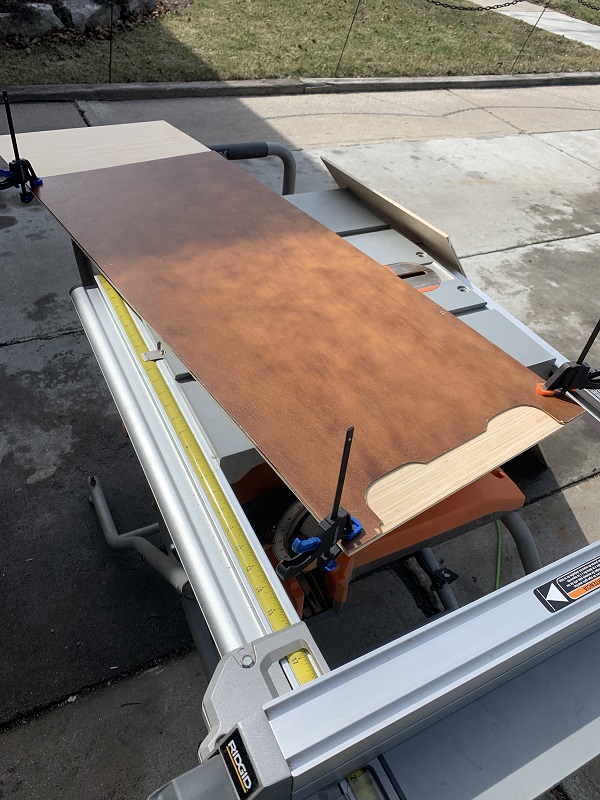
As you can see above, a few clamps will allow your to hold your piece in place so that you can trace it out accurately. After you trace it out a Jigsaw will make quick work of your cuts. Remember to use a blade that is meant for fine cuts (has more teeth) when cutting plywood. This will help prevent tear out and splintering of the plys.
Test fit your sides when they are done to make sure you don’t have to do any trimming. If you measured correctly and cut straight, they should fit nice and flush all the way around.
Sanding
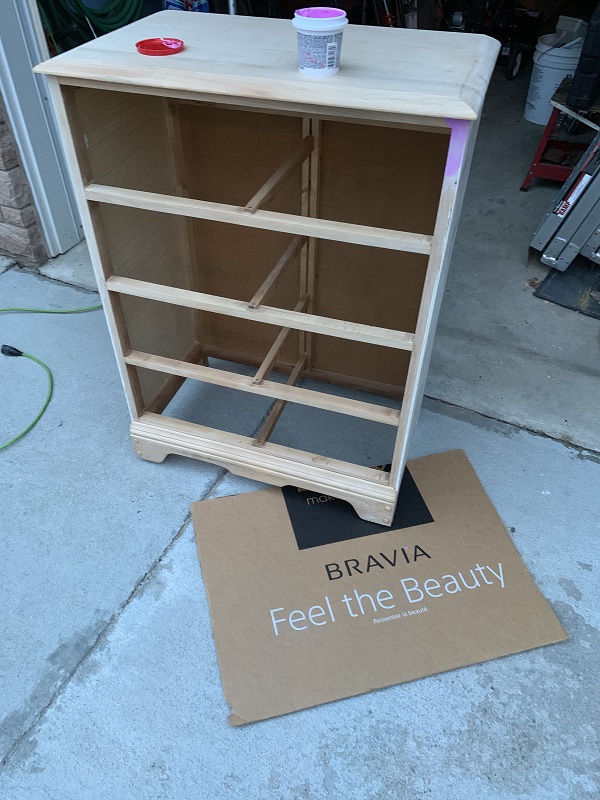
After I cut my sides I wanted to prep my top for staining. I also want to prep the “skeleton” pieces of wood (as I call them) that show in between the drawer faces for painting. I do this by starting off with a 80 grit sandpaper and working my way up to 220grit. A palm sander works wonders to cut your work in half but note that any nice round edges or design work on your wood piece should be done by hand to preserve the look. As you can see from the photo below, I sand the entire dresser at this point minus the plywood pieces.
Assembly Required!
The best way that I found to assemble your dresser is with pipe clamps, glue and a brad nailer. If you are using nails be mindful of how long your nails are and where you are shooting them in. It’s no good if your nails are sticking out the other side and rip your shirt or your hands when you use the dresser later!
Follow the drying time for your glue, but don’t be rushed when putting this all together. Adjust your clamps as you go and make sure your side pieces are perfect. If you haven’t done this before and extra hand can help relieve stress and assist you.
Once I clamped my sides on and made sure everything was straight, I put some brad nails into tack the sides down. I then wiped off excess glue.

The Magic of Spackling
Now that you put your repaired sides on you are probably wondering how you are going to hide the plywood layers from view. Simply painting over them probably won’t hide it as the end grains of wood do a great job of sucking in paint. The easy answer? Spackling. Just like drywallers mud the joints of drywall all over your house and you can’t see it, same concept applies here.
I use dry dex but if you are familiar with other spackling products I am sure they will work great too. Mix your dry dex around to get it to a workable consistency. If you have older dry dex you can add a few tiny drops of water to help. Use your putty knife and run spackling into all of your seams. When it dries sand it so that everything is totally flush. This means you’ll almost be transparent where you applied it.
If you are going to use new knobs and they do not match the drilled holes in your drawers, you’ll want to add a small wood dowel and use a bit of spackling to hide the old holes and drill new ones when you put your new knobs on. Unless you bought new knobs that cover the old holes then you can leave them.
Dry Dex goes on pink and dries white. So there is no guess work when it comes time to sand it down.
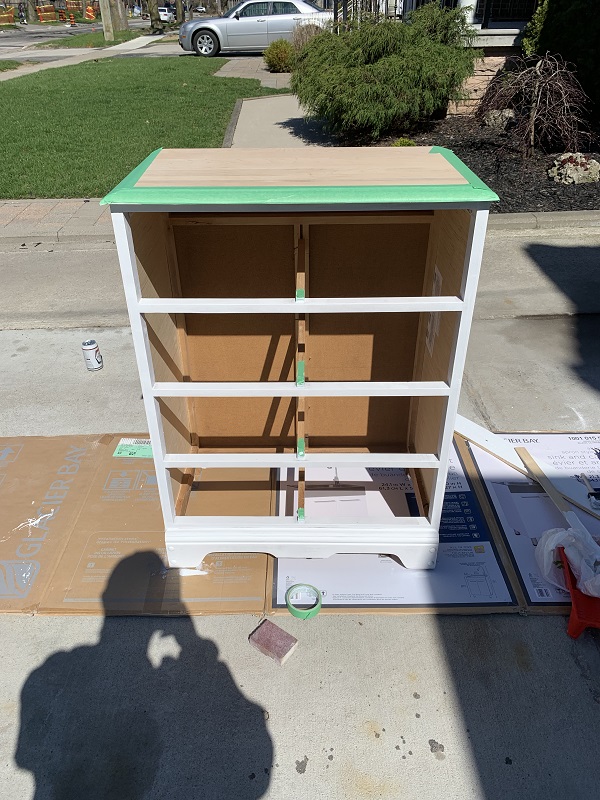
Tape & Paint
Before I paint anything I make sure that anything I don’t want to be painted is covered. I know how sloppy I am, if you haven’t done this before you are probably sloppier than me, so make sure you cover enough area.
You are going to start with your primer. Usually a single coat of primer is good enough. No need to roll anything on thick, keep to thin coats. For paint I typically need 2-3 coats of paint when my paint and primer are similar colours.
For best results, lightly sand between coats of paint (after it is dry) with 220 grit. Make sure you remove all the dust after and you should use a mask when sanding.
I always start with my paint brush and get all the hard to reach areas like corners and edges where two pieces of wood meet. Then I work a section at a time with my roller.
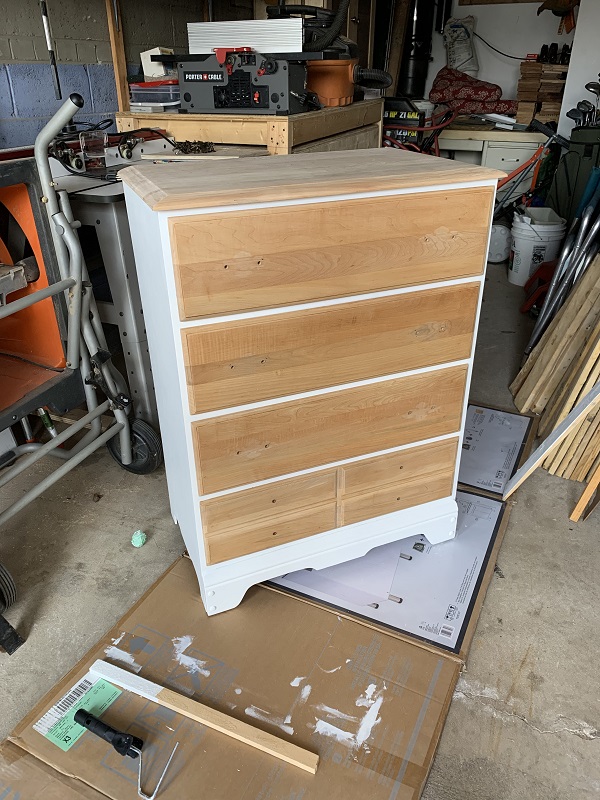
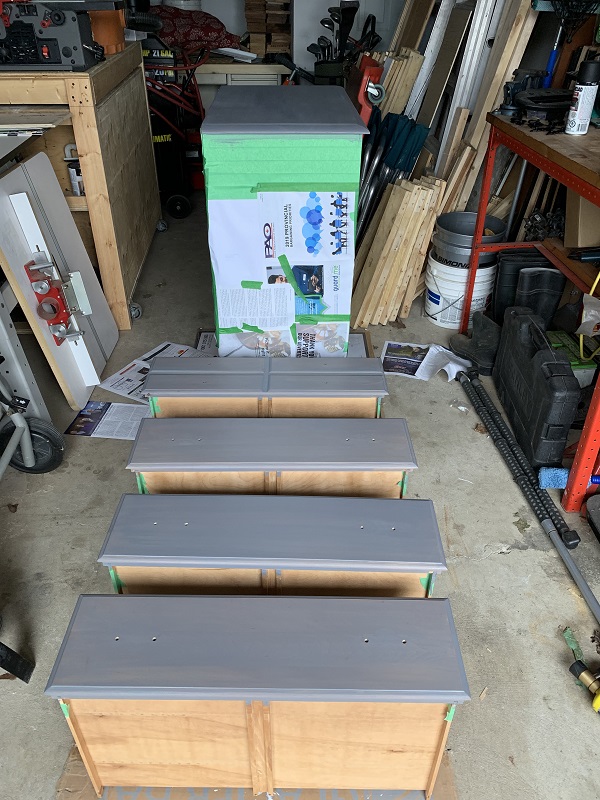
I actually kind of liked the bare wood look and considered leaving this look and just varathaning it. But I also liked the stained look a little better…
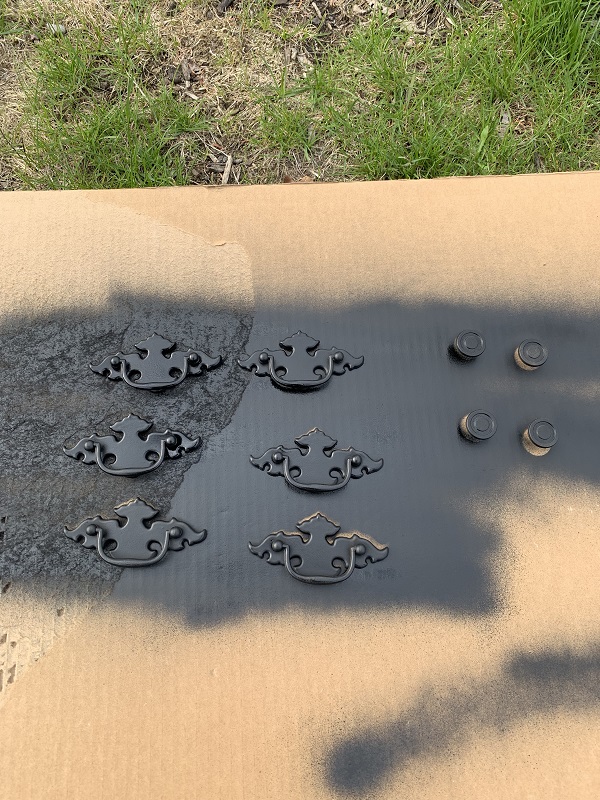
I like to multitask where I can. Since I was reusing the old hardware, I opted to take this time to spray paint my knobs and handles black to modernize them a little.
Wood Stain & Polyurethane
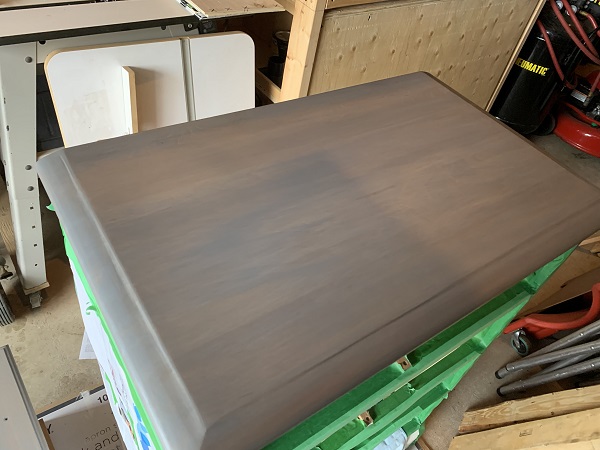
Time to stain your top and drawers. My biggest tip here is to follow the instructions on the can of your stain. Every product is applied differently and has different dry times. Do not stain your project when it is humid out. That is the fastest way to get a white milky blushing finish that ruins your hard work.
I also like to tape off the sides of my drawers. Nothing to me makes a job go from pro to amateur faster than having sloppy paint all over the sides of the drawers that can be seen every time you slide them out. Stain is best wiped on with a rag, polyurethane is usually best applied with a bristle brush.
Important safety tip, when you are done with your stained rags, lay them out to dry. Balled up rags full of stain can start a fire due to chemical reactions. Please be safe.
I know my garage is messy… there was a lot going on at the time…
Finished Product!
Here is the finished product. From old school to a modern refresh.

